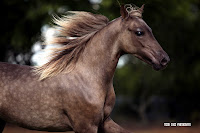
Several of you have asked how I blur out the background in some of my photos. It’s a great way to make your subject standout for the background. I could get really technical, but will keep it simple.
Blurring the background is all about controlling your Depth of Field by using the aperture on your camera. If your camera has an aperture priority mode, this is the easiest way to achieve this. For cameras that do not have aperture priority, try using the portrait mode. Check you owner’s manual for the actual location, but the aperture mode is usually indicated by an Av, and portrait mode is usually a headshot profile silhouette.

 The aperture is like the pupil of your eye and can increase and decrease in size. The size is indicated by f-stops. The smaller the f-stop the larger the aperture and the larger the f-stop the smaller the aperture. Confusing right, but there is a mathematical reason for that, but we won’t go in to that. The smallest aperture that most point and shoot cameras or cameras that come with kit lenses is f/3.5 which should work. If you want to improve the blur (or bokeh) you can find lenses that are as small as f/1.2 , but they can be quite pricey. To start out, you can get a nice f/1.8 for a very good price. The aperture also controls the amount of light that enters the camera, same as you pupil does in your eye.
 Since I am trying to keep this simple, I will get back to how to blur the background. You must make the increase the aperture size. Unless you know how to put your camera on manual and adjust the shutter speed to concur with the aperture you have selective, I recommend using the aperture priority and let your camera’s internal light meter choose the shutter speed. Most of the time it gets it right, sometimes you may have to make some exposure adjustments to perfect it. The amount or quality of blurring can also depend on your camera’s sensor size, how close you are to the subject and lens.
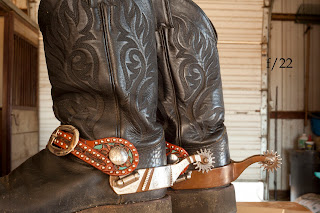
Below are some samples of the same subject. The first set is done with a 50mm prime lens and the 2nd set is done with a 70-200mm lens set at 200mm. Even though the 70-200mm lens is large and heavy, it is my favorite and use it a majority of the time. I took the 2 side photos with it.
Photos taken with 50mm lens
At f/1.8 the front boot is in focus the back boot, starts to loose focus. I was ~5 ft away from the boot, the back wall is ~20 feet fromt he bootsAt f/4 the back boot is almost in focus, the back wall still remains out of focus
At f/8 both boots are in focus and background is starting come into focus and looking cluttered

At f/22 almost everything is in focus and now you have a snapshot. Leaving you camera on auto would probably give the same results.
Photos taken with 70-200mm at 200mm

A telephoto lens helps blurr the background even more. At f/2.8 at 200mm background is very blurred
Even at f/32 at 200mm the backgroud is still slightly blurred
Want to learn more, be sure to sign up for photography lessons and learn to create your own great portraits.


Oh my gosh! Thanks so much for this tip!! I got a new Canon T1i for christmas and i love to take pictures, but i really dont know anything about how to work my camera! The way you explained it was so clear and easy for me to understand! Maybe ill look into your class :)
ReplyDelete